User Manual
WARNING
- Please read and follow the following precautions when installing and using the Time Machine console. Failure to follow these guidelines could result in damage to your Time Machine console or accessories.
- Failure to follow certain instructions in this manual may void the warranty of your Time Machine console.
- To reduce the risk of damage to the console, use only the AC adapter included with your unit.
- The console has an air intake and ventilation grille designed to provide adequate ventilation. Do not operate the console where these ventilation points may be covered or obstructed, such as on carpeting or in an enclosed space. Do not allow dust or foreign objects to accumulate on these ventilation points.
- Do not disassemble or attempt to repair the Time Machine console, its accessories, or components. Doing so may damage them.
- Do not store the Time Machine in a damp location, on the floor, or in any other location where it may be exposed to dirt, dust, moss, etc.
- Do not step on the wires, pull them sharply or bend them.
- Do not expose the Time Machine console, its components, or accessories to intense heat or cold.
- Do not spill any liquid on the Time Machine console, its components, or accessories. To clean them, use a soft, slightly damp cloth. Allow drying before use.
- A 128GB MicroSD card is provided and previously inserted into the SD card slot on the side of the console. Please never remove this SD card.
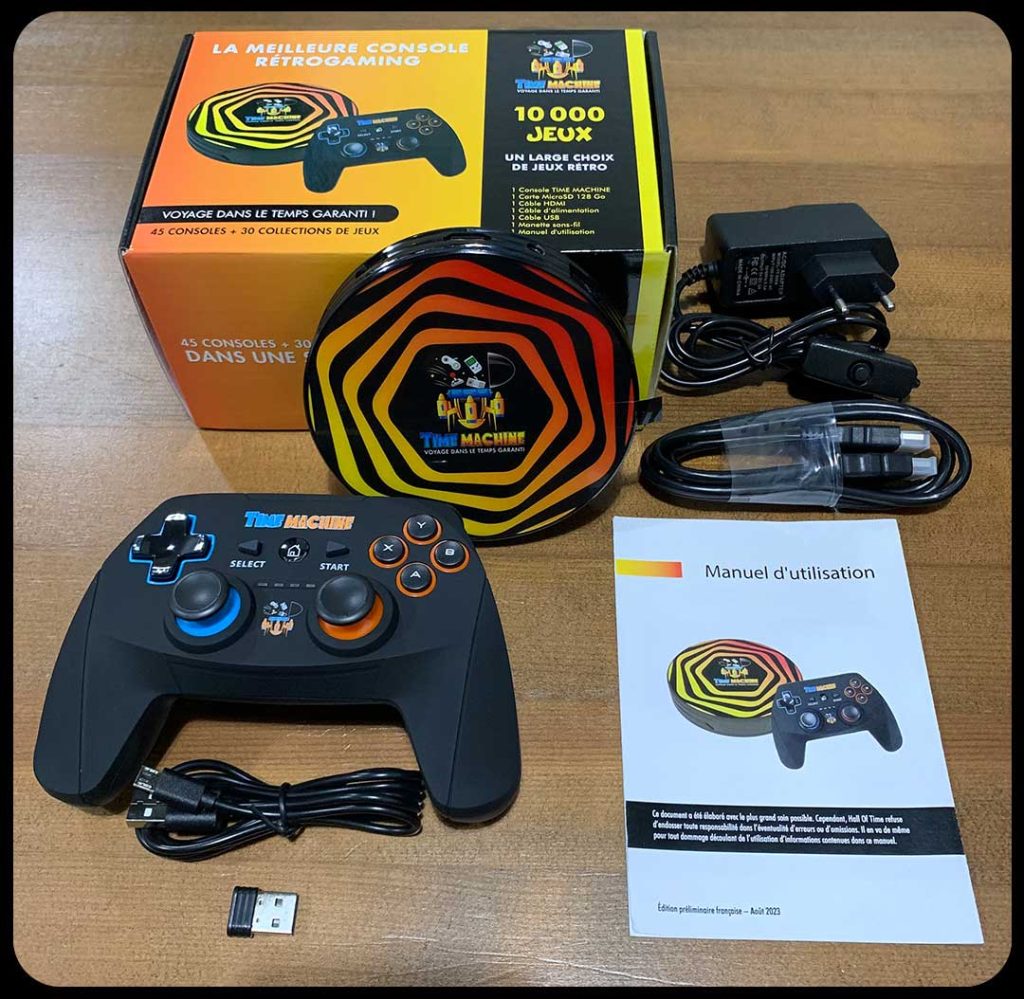
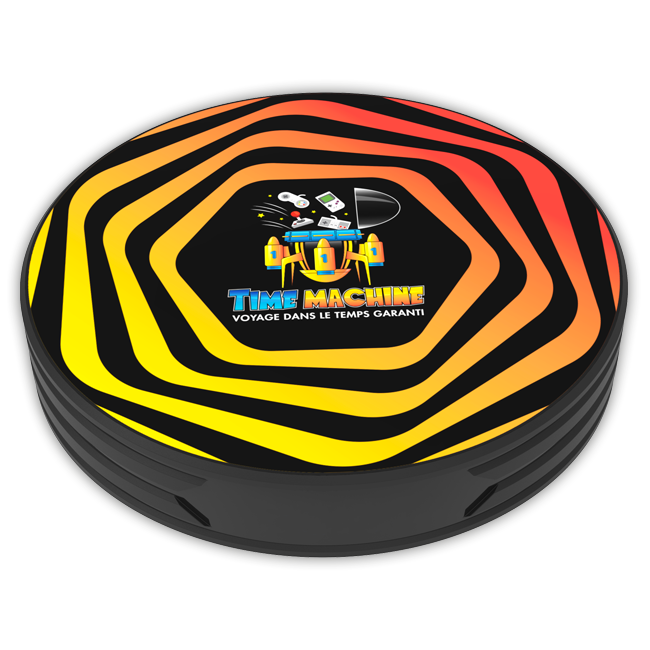
Time Machine Console

Wireless Pro Controller

Micro SD card

Bluetooth dongle

HDMI cable

USB cable

Power cable
Installation of the Time Machine console

- Plug the HDMI cable connector into the HDMI output at the back of the console.
- Plug the HDMI cable connector into the HDMI input port of the television.
- Plug the controller’s dongle into one of the USB ports on the console to ensure it is recognized.

Plug the power cable into an electrical outlet and press the POWER (ON-OFF) button located on the power cable to turn on your Time Machine console.
Turn on your television connected to your Time Machine console.
Select the HDMI input that corresponds to the connected Time Machine console.
Once you have completed all the installation steps and are ready to use the Time Machine console, you should select the appropriate input on your television.
IMPORTANT: Each time the console starts up, it undergoes a pre-loading of 40 to 60 seconds during which it provides no signal or display. Once the pre-loading is complete, the time will be displayed on the front screen of the console.
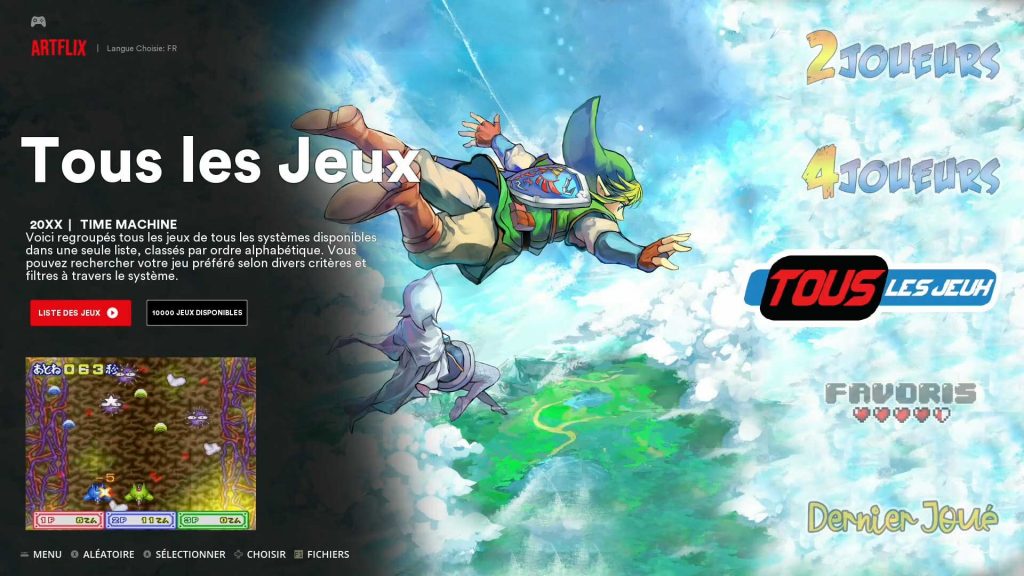
In the main menu of the console, you can navigate between the different systems using the Time Machine controllers.
Game Launching: Unlike the main menu, when you start a game, in most cases only Controller No. 1 will be able to control the game until the menu selection.
The console automatically assigns which controller will be Controller No. 1 randomly when launching a game.
For example, in Mario Kart 64: if you want to play with 2 or 4 players, the player holding Controller No. 1 must navigate to the multiplayer game mode selection. Once you reach the character selection screen, the other players will then be able to choose their character.

IMPORTANT: When the dongles are connected, the controllers are still recognized even if they are turned off. It is therefore recommended to have only one dongle connected when playing with one player.
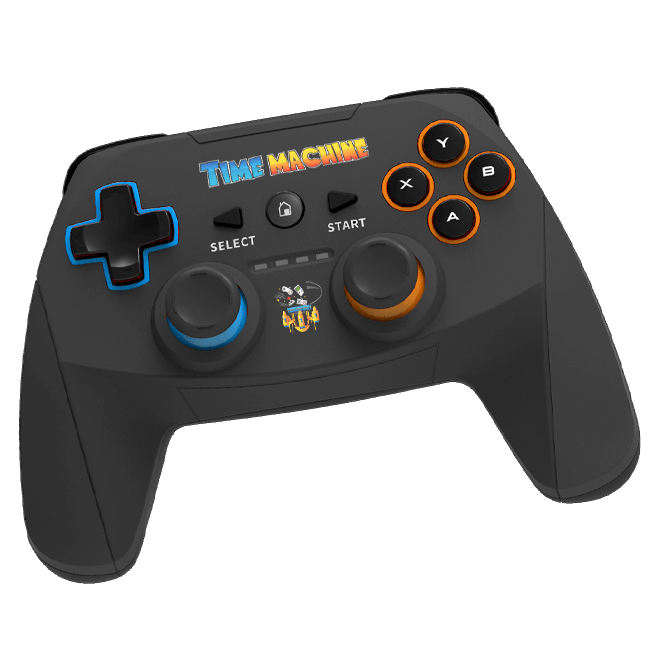
Turning off the controller: To turn off the controller, press SELECT + LS (click the left joystick). In case of inactivity, the controller will automatically turn off after 5 minutes.
Several shortcuts are available in the games:
■ Exit Games : For all systems except PSP and DS, quickly press the START and SELECT buttons twice in a row at the same time.
■ Quit a PSP Game : Press the “LT” trigger, then select the “Return to Menu” option followed by “Quit.”
■ Exit a Nintendo DS Game : Simply press the “LT” trigger on your controller.
■ Change Disc : In some games, like Final Fantasy VII, you will be asked during gameplay to change the disc. To do this, follow these steps:
Press SELECT + RS (click the right joystick) to eject the disc.
Press SELECT + RIGHT or LEFT ARROW to change the disc. The number of the selected disc will appear at the bottom left of the screen.
Press SELECT + RS again to insert the selected disc.
■ Quit an OpenBOR Game : Simply return to the game’s main menu and select “QUIT” or “EXIT GAME.”

Searching for Games: The search option will make your life easier when looking for your favorite games with its many search options and filters. To access the search menu after selecting the console of your choice, press the “SELECT” button on your controller. In addition to being able to search for your games by name, dozens of search options are available, allowing you to sort games by genre, publisher, rating, and more.
N.B: If you want to search for a game across all the systems included in the console, activate the search option in the “All Games” section of your console. Don’t forget to reset the filter once your search is complete to retrieve the list of all games; otherwise, the filter will remain in memory. To do this, simply go back to the “SELECT” menu and select “Reset Filters (RAZ des filtres).
Instant backup and loading
- The “Quick Save” and “Quick Load” options allow you to save and resume your game exactly where you left off. This is very convenient for certain games that do not allow saving at any time. • To SAVE your progress, press SELECT + DOWN ARROW. • To LOAD your progress, press SELECT + UP ARROW. For the PSP, the procedure is as follows: Press the LT trigger on your controller to access the in-game menu, then select the “Save State” tab. You can then perform the same action by pressing “Load State” to resume your game from where you left off.
For the PSP, the handling is almost the same, you just have to press the “LT” trigger on your controller to access the game menu and then select the “Save Status” tab. Then, you just need to do the same thing, this time pressing “Load Status” to resume your game where you left off.

Add/delete a game from your favorites
The “favourites” section allows you to easily find your favourite games. To add or remove games from your favourites, simply press the “Y” button on your controller. A selection of the best games for each console has already been made, but you can of course modify it as you wish by adding or removing games.

- Nintendo DS emulation is quite unique since it consists of 2 screens, one of which is touch-based and usually played with a stylus. The stylus is replaced by the joysticks: simply move them to make your stylus appear and click on it to simulate a touch on the screen.
- The arcade consoles MAME, ATOMISWAVE, CAPCOM, FINAL BURN NEO, and NAOMI require credits to play.
To add credits, it’s very simple: just press the SELECT button on your controller.